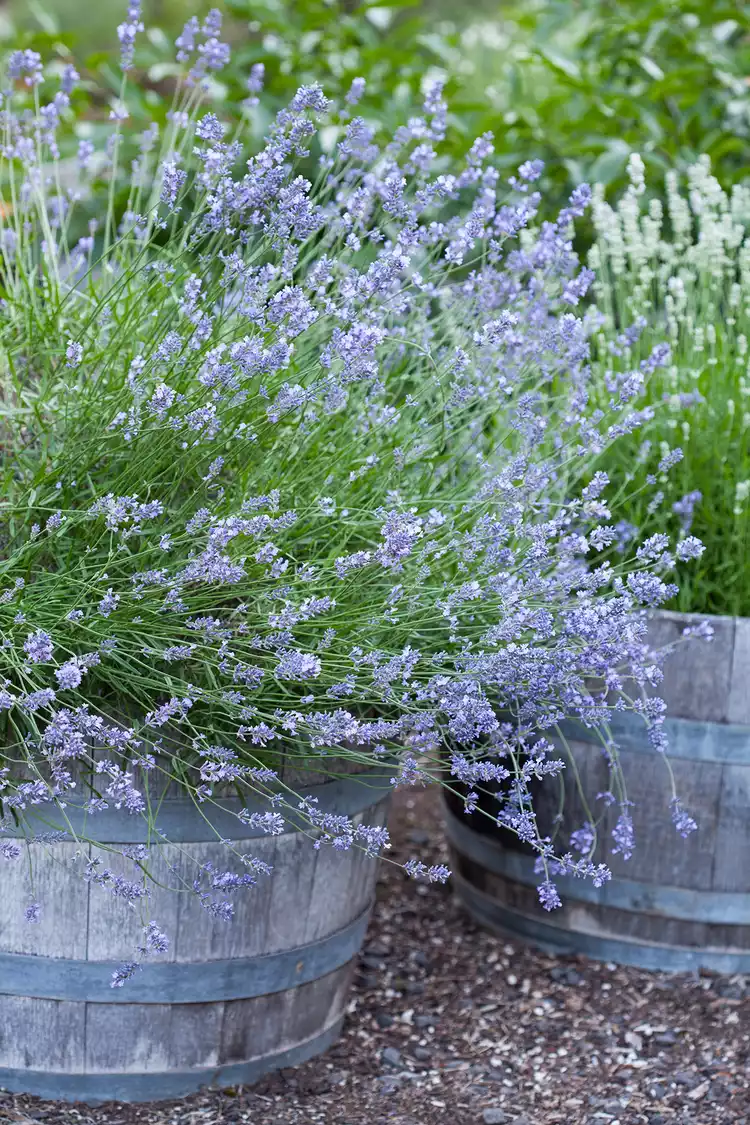
Growing lavender in pots lets you enjoy this ultra-fragrant herb wherever you have a sunny spot. So even if you don't have room for a field of lavender in your landscape, you can tuck in a few containers of lavender (Lavandula spp.) in small, sunny spots like a south-facing entryway, patio, or balcony. Get started on your own potted lavender patch with this step-by-step planting guide. Plus get must-know tips for successfully growing lavender in pots.
How to Plant Lavender in Pots
No matter which type of lavender you want to grow in pots, follow these steps to get your plants off to a strong start.
1. Select a container.
Look for a container that is at least 18 inches wide to provide space for the lavender plant to grow plenty of roots. Plastic, fiber, and resin pots are lightweight and easy to move. Ceramic and stone planters also work well. If your chosen container doesn’t have drainage holes in the bottom, add them before planting your lavender.
Lavender plants grow in a roughly circular outline about 18 inches in diameter. Pots 36 inches or larger in diameter can fit more than one lavender plant.
2. Use a well-draining potting mix.
Lavender is a dryland native so its roots demand loose soil with excellent drainage. High-quality potting soil paired with a pot that has ample drainage holes creates a welcoming environment for lavender. Fill the container two-thirds full of potting soil. Tamp the soil to eliminate large air pockets.
3. Buy lavender plants.
Although you can start with seeds, transplants from a garden center are generally the easier and quicker way to go when growing lavender in pots. Lavender is a perennial herb that grows very slowly from seed, and often won’t bloom until the second growing season. Transplants will grow a dense mound of foliage and even bloom during the first growing season.
4. Plant lavender in container.
Remove your lavender transplant from its nursery pot, and set it in your planter. Fill in with additional potting mix, making sure the top of the lavender root ball is even with surface of the potting mix, which should be about an inch below the rim of the planter. Tamp the soil to eliminate large air pockets, then water in the plant.
Care Tips for Growing Lavender in Pots
Light Requirements
Light is the most vital factor when choosing a location to grow lavender in pots. Lavender needs at least six to eight hours of direct sun daily to grow well and produce abundant flower spikes. The south or west side of a home is ideal. Be mindful of nearby trees or structures that cast shade, obscuring the direct rays of the sun.
Watering
Water when the soil in the pot is dry to the touch an inch below the surface. Lavender is drought-tolerant; overwatering is the most common cause of this herb's demise, and potted lavender requires less frequent watering than most other container plants.
Fertilizing
Lavender needs minimal fertilizer. Over-fertilized plants produce an abundance of foliage and few flowers. Too much fertilizer also makes the plants more vulnerable to pests, diseases, and cold weather injury. Compost is the best way to deliver nutrients. Spread a 1-inch layer of compost over the soil surface annually in spring, beginning the year after the plant is potted.
Pruning
Prune lavender in spring when green leaves emerge at the base of the plant. Remove approximately one-third of the length of each stem, shaping the plant as you go. Annual pruning prevents the plant from developing a woody center and wayward shape.
Pests and Troubleshooting
Lavender has few pest or disease problems. Root rot from overwatering is the biggest issue to watch out for. Check the soil moisture an inch below the surface before watering. Don’t water unless the soil is dry, and don’t allow pots to stand in water-filled pot saucers. It’s best not to use a pot saucer when growing lavender in a container. Allow the water to drain from the pot freely.
How to Overwinter Potted Lavender
Most types of lavender are perennial in USDA Zones 5–9 and will live from year to year. Overwinter potted lavender in a protected location outside—an area near the foundation of a home is often a good overwintering site. Provide extra insulation in Zones 5–6 by packing leaves or mulch around the pot. Spread a couple of inches of mulch over the soil surface. When daytime temperatures moderate in early spring and stay above freezing, move the pot to a bright, sunny spot.
