There's an open secret about roses: not only is propagating easy, but growing roses from cuttings is one of the best, most magical parts of having these plants around. There are several practical reasons to propagate roses from cuttings. If you have a variety that does especially well in your garden, rooting a few cuttings from that rose provides an inexpensive way to increase your collection. Or you may want to create backups of a rare variety or a family heirloom rose. Homegrown rose cuttings are also great for swapping with other gardeners. Here's how to grow roses from cuttings successfully, broken down into 10 simple steps.
Best Time to Take Rose Cuttings
You can successfully root rose cuttings any time of the year. But for more consistent results, check the weather forecast. Plan to take your cutting when daytime temperatures are above 55°F and below 90; the ideal is between 70 and 80. That will probably be in spring and fall. It's also best to take cuttings early in the morning.
What You'll Need
Equipment / Tools
- Sharp pruners, scissors, or knife. Disinfect with rubbing alcohol or Lysol.
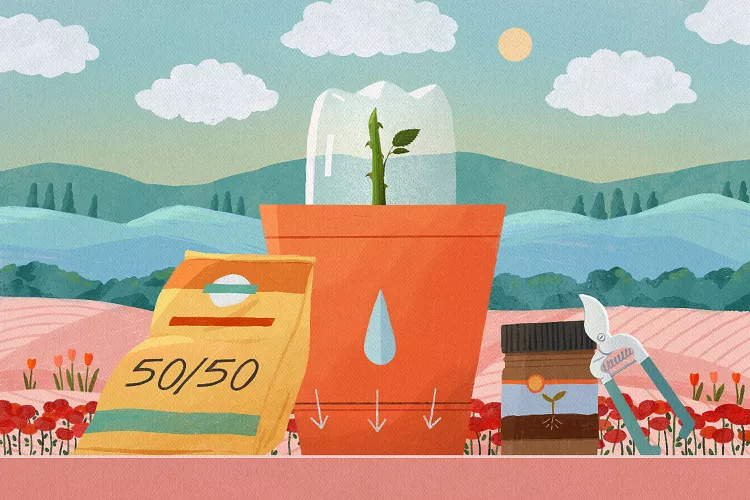
- A 2.5- to 5-inch-deep pot that drains well. This could be as simple as the cut-off bottom of a plastic milk jug with holes punched in the base.
Materials
- A 50/50 mix of perlite and potting soil. The mix should be sterile and hold roughly an equal amount of air and moisture.
- Rooting hormone. This powder improves your odds of success, but it's often not necessary. It should always be used on harder-to-root rose types like Damasks, Hybrid Teas, older wood, or winter cuttings.
- A clear cover to hold humidity around the cuttings. You could use the top part of that milk jug, or a 2-liter soda bottle with the base removed. A clear dry cleaning bag propped up with stakes around the pot works well, too.
Instructions
Overall, rose growing from cuttings is a simple process. Whenever you prune your rose plants or cut off the faded flowers, the balance of hormones in the removed stem changes. Under the right conditions, the changes stimulate it to grow roots. The resulting plant is identical to the parent.
-
Water the Day Before
Healthy, well-hydrated roses root better. Along with making sure to keep the parent plants in good shape through the growing season, water them the day before taking cuttings.
-
Take Cuttings
Choose stems immediately below flower buds that are just about to open. The second best option is stems beneath flowers that have begun to drop their petals. Aim for cuttings that are 4-8 inches long with three to five nodes (the regular intervals where buds, leaves, and stems emerge). The cut at the base should be about a quarter of an inch below a node and the cut at the top should be about a quarter inch above one.
Heel wood often roots more easily. It's located at the base of a stem right where it emerges from another stem. Try pulling your stem straight out from where it attaches. Or cut slightly into the older shoot with a sharp knife.
-
Place Cuttings in Water
Immediately put your cuttings into a container of water out of direct sunlight. Or wrap cuttings in damp paper towels and place them in a cooler. You want to keep the cut stems as hydrated as possible.
-
Slice Bottom End of Cuttings
Rooting is part of a wound response for roses. Encourage increased rooting by vertically slicing through the green skin on the bottom inch of the cutting. Do this two to four times spaced roughly equally. Or you can gently scrape a strip or two of the green skin on the bottom inch (just don't remove the skin all the way around the stem). If the variety has large prickles, ripping them from the base also wounds the stem enough to encourage roots to develop.
-
Dip Cuttings in Rooting Hormone
If using rooting hormone, apply it to about two inches of the base of your cuttings. If you're trying to grow roses from cuttings without rooting hormones, steps 1-4 are even more important.
-
Remove Flowers and Most Leaves
Cut off the flower bud or spent flower and all but the top leaf or two. Reduce the top leaves to three or four leaflets total. Slice the bud from the lowest node to encourage roots to grow.
-
Place Cuttings Into Potting Soil
Stick your rose cuttings about two inches into a container of fresh all purpose potting mix. Press the mix around the stem and water thoroughly. Then add your humidity cover and place the pot in a location with indirect sunlight. This could be on a covered porch, on the side of a shed, or under trees. Some people choose to root rose cuttings indoors on a shady windowsill.
-
Check Cuttings Periodically
If your humidity cover doesn't have ventilation, lift it briefly a couple of times a week. You shouldn't need to add more water unless the potting mix seems to be completely drying out. Whenever you're lifting the cover, check for cuttings that have turned brown all the way to the base and remove them, along with any fallen leaves.
-
Remove Humidity Cover
Rooting can happen within a couple of weeks, but expect it to take a month or two. When you start to see roots from the side or bottom of the pot and new leaf growth, you can begin to acclimate the new roses outside of the humidity cover. If you rooted several in a single pot, you should carefully repot them into individual containers.
-
Plant Rooted Cuttings in the Garden
Give your rooted rose cuttings 9 to 12 months to develop enough to plant in your garden. During that time you may want to move them to a slightly larger pot with a 20/80 mix of perlite and potting soil with slow release fertilizer to fuel new growth.
Tips for Propagating Roses from Cuttings
Growing roses from cuttings may start to sound complicated, but remember that these are just guidelines to get more consistent results. It's possible to stick a rose cutting directly into your soil and come back to find it rooted months later. Or maybe if you wrap cuttings in damp paper towels and forget them in a cooler on the 4th of July, you might find a few still alive and actually rooted on Labor Day. People have successfully rooted a 5-foot-long cane, a 1-inch cutting, and less-than-optimal wood in the heat of summer and the middle of winter.
You can also add more tools to the process as you get into it. For example, using fluorescent lights, heat mats, and mycorrhizal fungi can increase your success. But there are some popular rose rooting tips that you should approach with skepticism.
